This guide will walk you through the process of setting up an email address in Thunderbird.
Thunderbird by Mozilla is a popular email client to send, receive and organise emails. It is a cross platform application which is available for Windows, Mac OS X and even Linux.
Installing Thunderbird
Before you continue, you will have to download and install Thunderbird on your computer. Click the link below to visit the Mozilla download page. Once you have downloaded the program, you can follow the easy on-screen instructions to complete the installation process.
Download Thunderbird: Here
Setting-Up Email
Once Thunderbird is installed, launch the application. You should then be presented with the following screen:
Here you will need to fill in your name, email address you wish to set up and the password for it.
Once done, click "Configure Manually".
Account Details
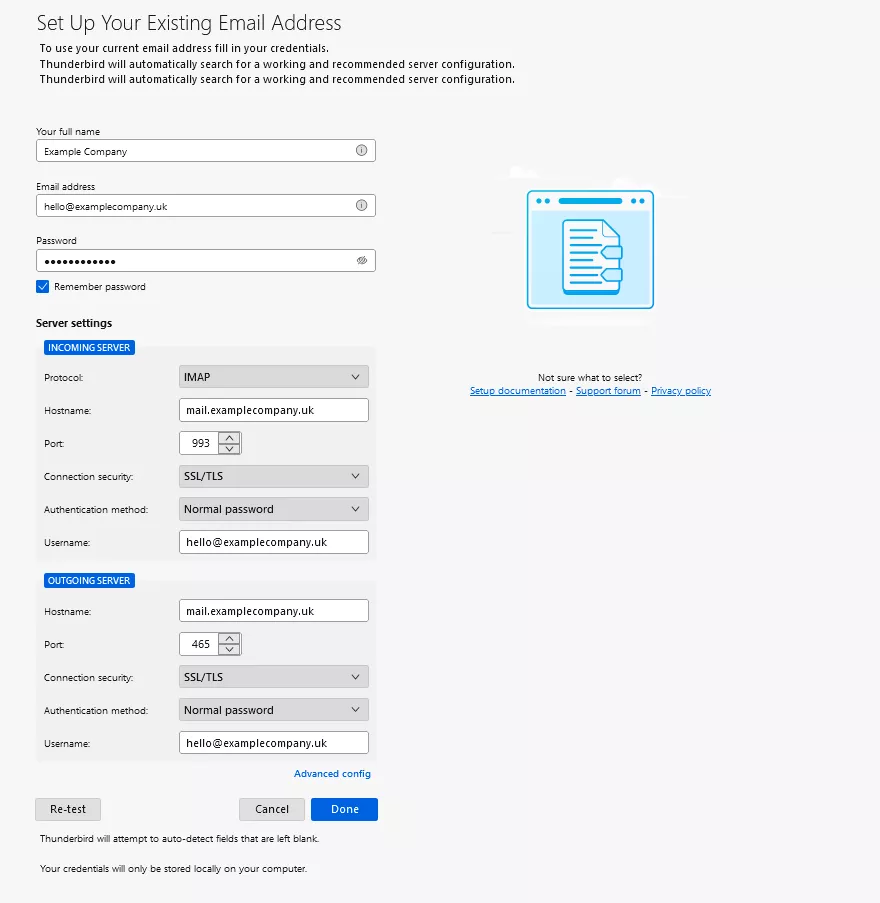
Once you have clicked "Configure Manually", your screen will expand. Here you will need to enter the following information:
- Protocol - Please select IMAP.
- Hostname - In most cases this will simply be mail.domain name (eg. mail.examplecompany.uk). If in doubt, please refer to the "Help" link in the Email Address section of your Easy Sites control panel or if we provided you with your account details, please refer to our account creation email.
- Port - For the incoming server, please use Port (993). For the outgoing server, please use Port (465).
- Connection Security - Please select SSL/TLS.
- Authentication Method - Please select "Normal password".


Now click "Done" to complete the setup process.

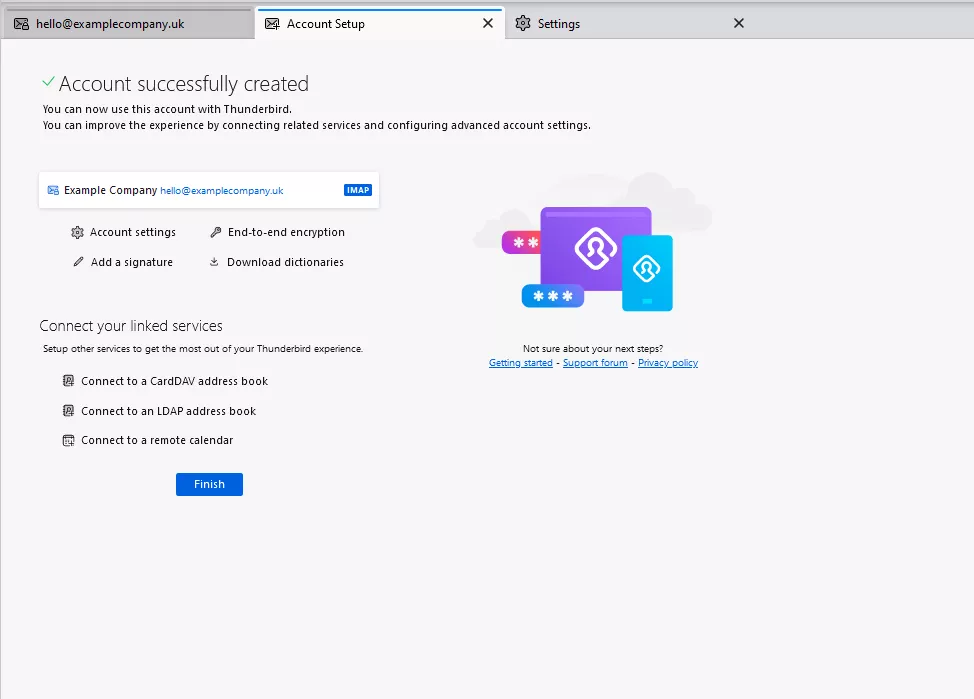
Your emails are now setup. Thunderbird will start synchronising all your Emails. Click "Finish" to be directed to your email inbox.
Need Help?
If you have any problems following this guide, please contact our team here.
