In this guide we will walk you through how to set up your business emails in Gmail.
To add your Easy Domains email to Gmail, you must first have the following:
- An e-mail address set up with Easy Domains
- A Google account
- A Gmail email address
Opening Gmail
Start by visiting gmail.com in your preferred web browser. If you have yet to complete your Gmail set up, please follow Google's Gmail account setup tutorial.
Once you've set up your default Gmail account, you will first land on your Gmail inbox.
Accessing Settings
To access your full list of settings, please click the cog icon in the top right
Followed by See all "settings"
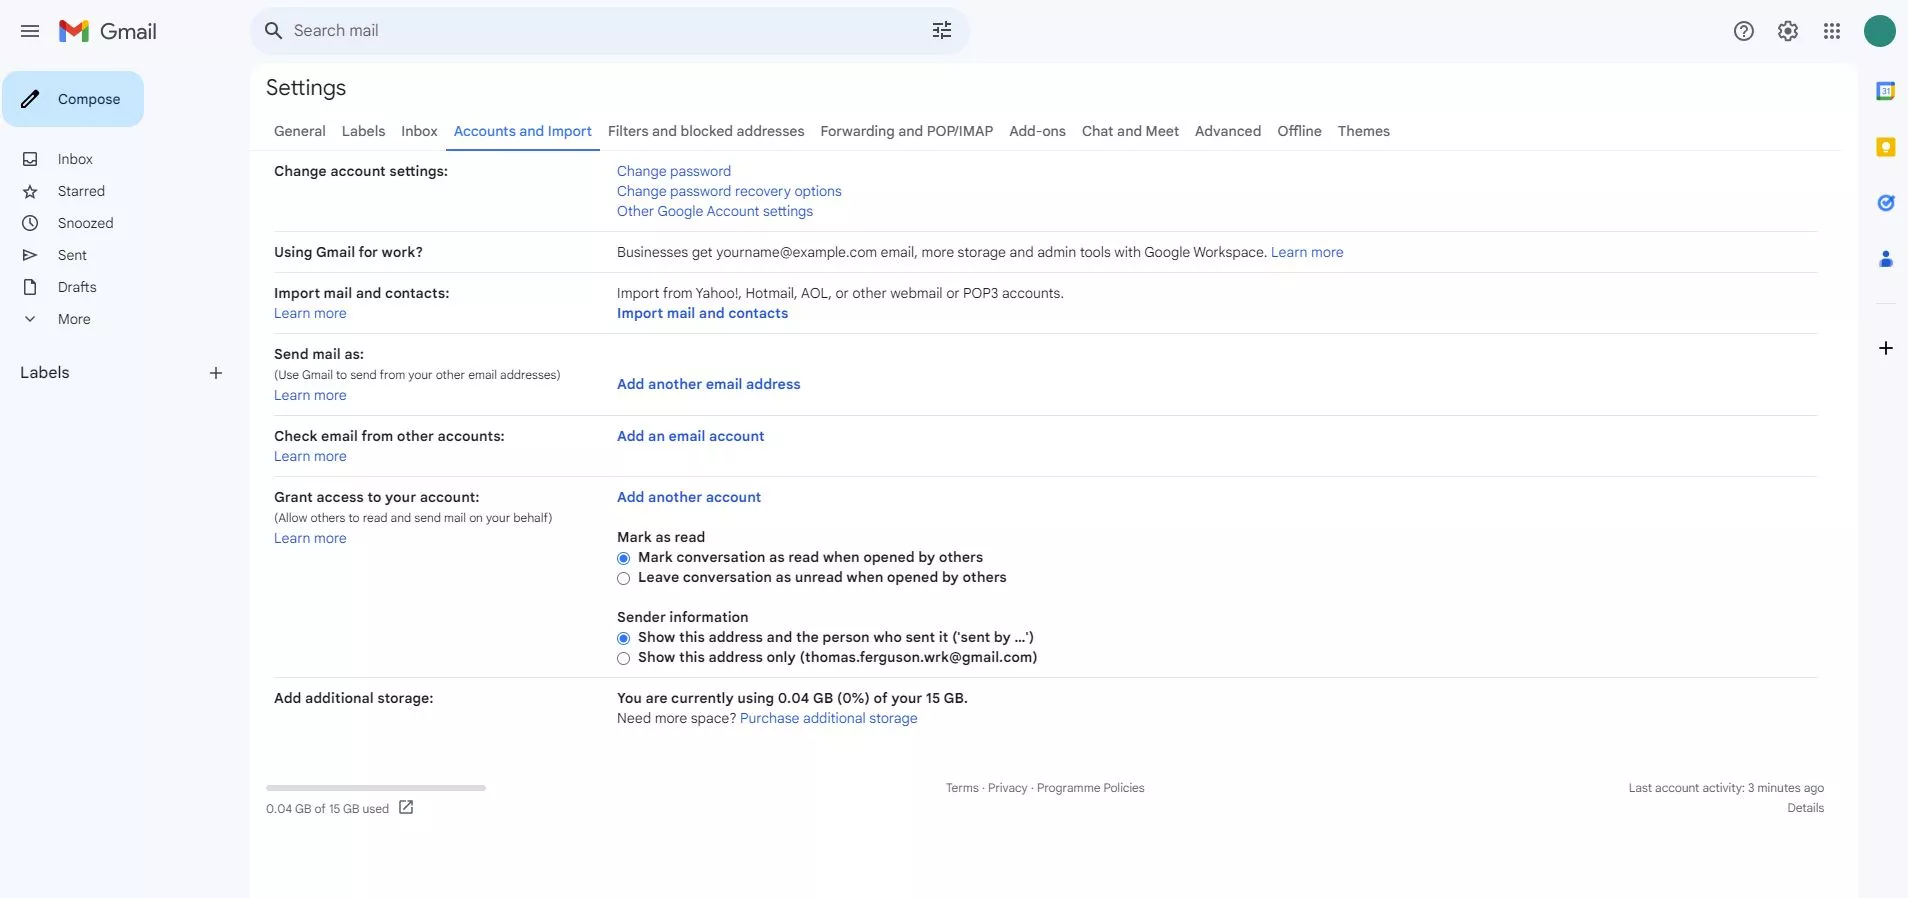
Accounts & Import Tab
From here, select the "Accounts and Import" tab, then half way down the page, select "Add an email account".
Adding Account Step-by-Step
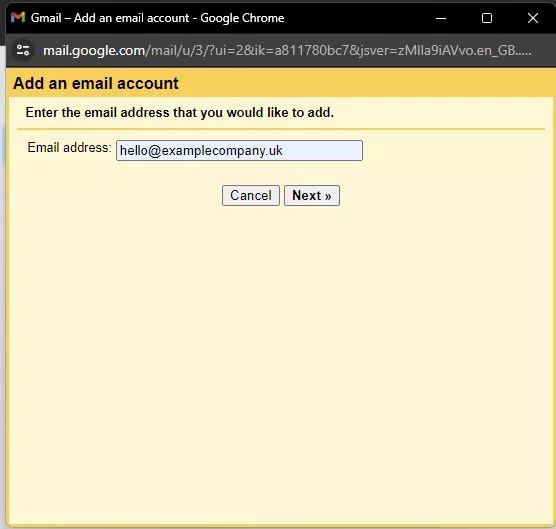
Step 1
You will see a pop-up window which prompts you to enter the email address you are looking to add to Gmail.
Step 2
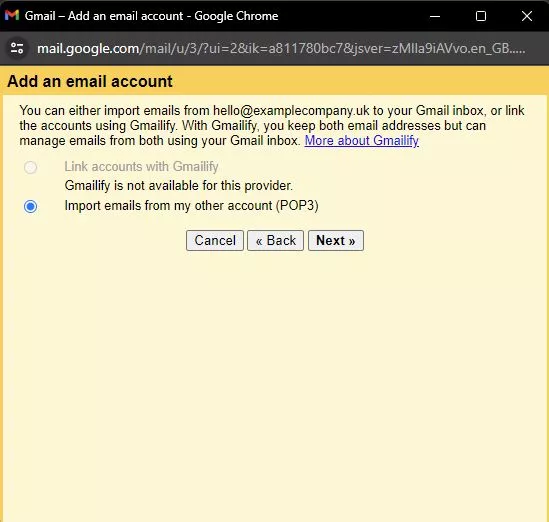
On the next screen, select "Import emails from my other account (POP3)" and click next.
Step 3
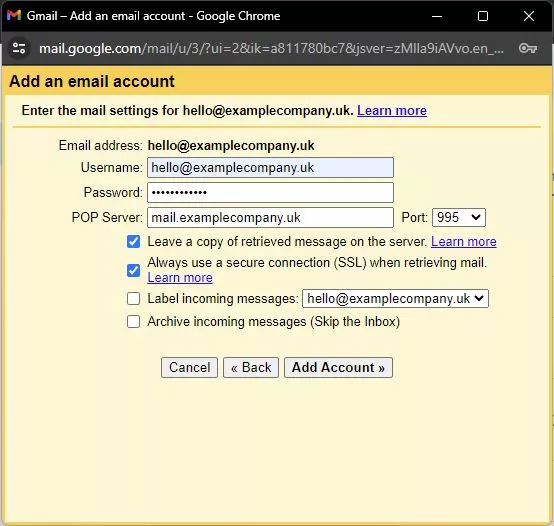
On the following screen, you will need to enter the following information:
- Username - Please use your full email address (including the domain name).
- Password - Please use the password for your Easy Domains email address.
- POP server - In most cases this will simply be mail.domain name (eg. mail.examplecompany.uk). If in doubt, please refer to the "Help" link in the Email Address section of your Easy Sites control panel or if we provided you with your account details, please refer to our account creation email.
- Port - Please use the Encrypted POP3 Port (995).
- SSL - Please ensure that "Always use a secure connection (SSL) when retrieving mail." is checked.
This completes the incoming server setup. You will now be able to view emails sent to your business email address in Gmail. If you would also like to send from this email address, please select "Yes I want to be able to send mail as ___ " and proceed to the next step.
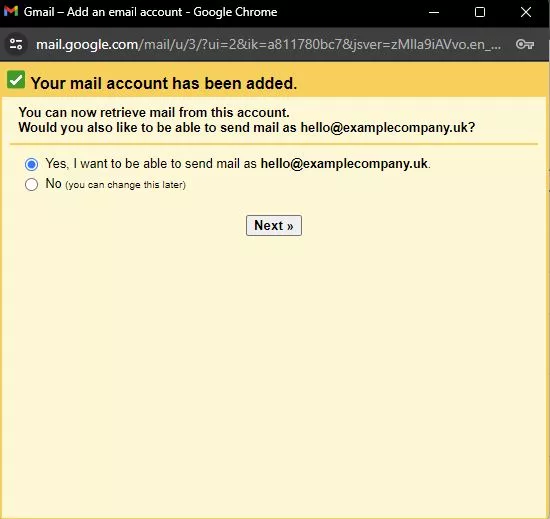
Step 4
Here, you'll need to enter the name you wish to be seen as, in this example it will be "Example Company".
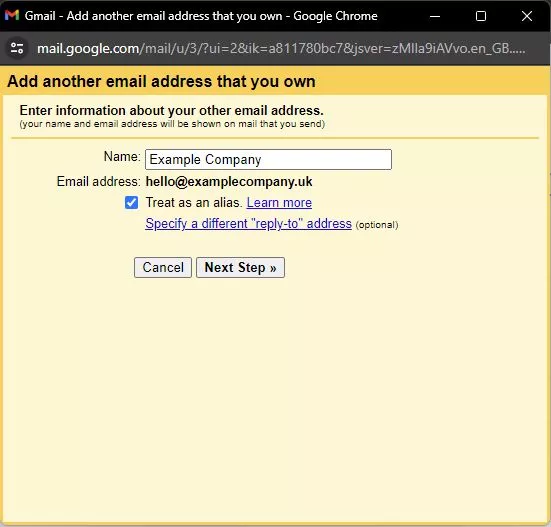
Step 5
For your outgoing settings, please enter the following details:
- SMTP Server - The SMTP server is the same as the POP server as outlined above.
- Port - Please use the Encrypted SMTP Port (465).
- Username - Please use your full email address (including the domain name).
- Password - Please use the password for your Easy Domains email address.
- Encryption method - Please ensure "Secured connection, using SSL (recommended)" is checked.
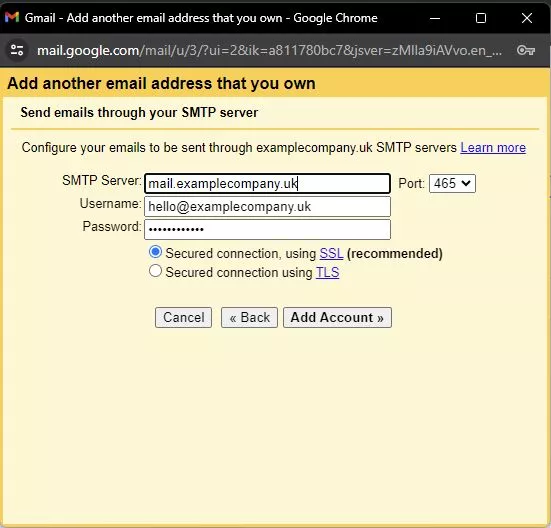
Step 7
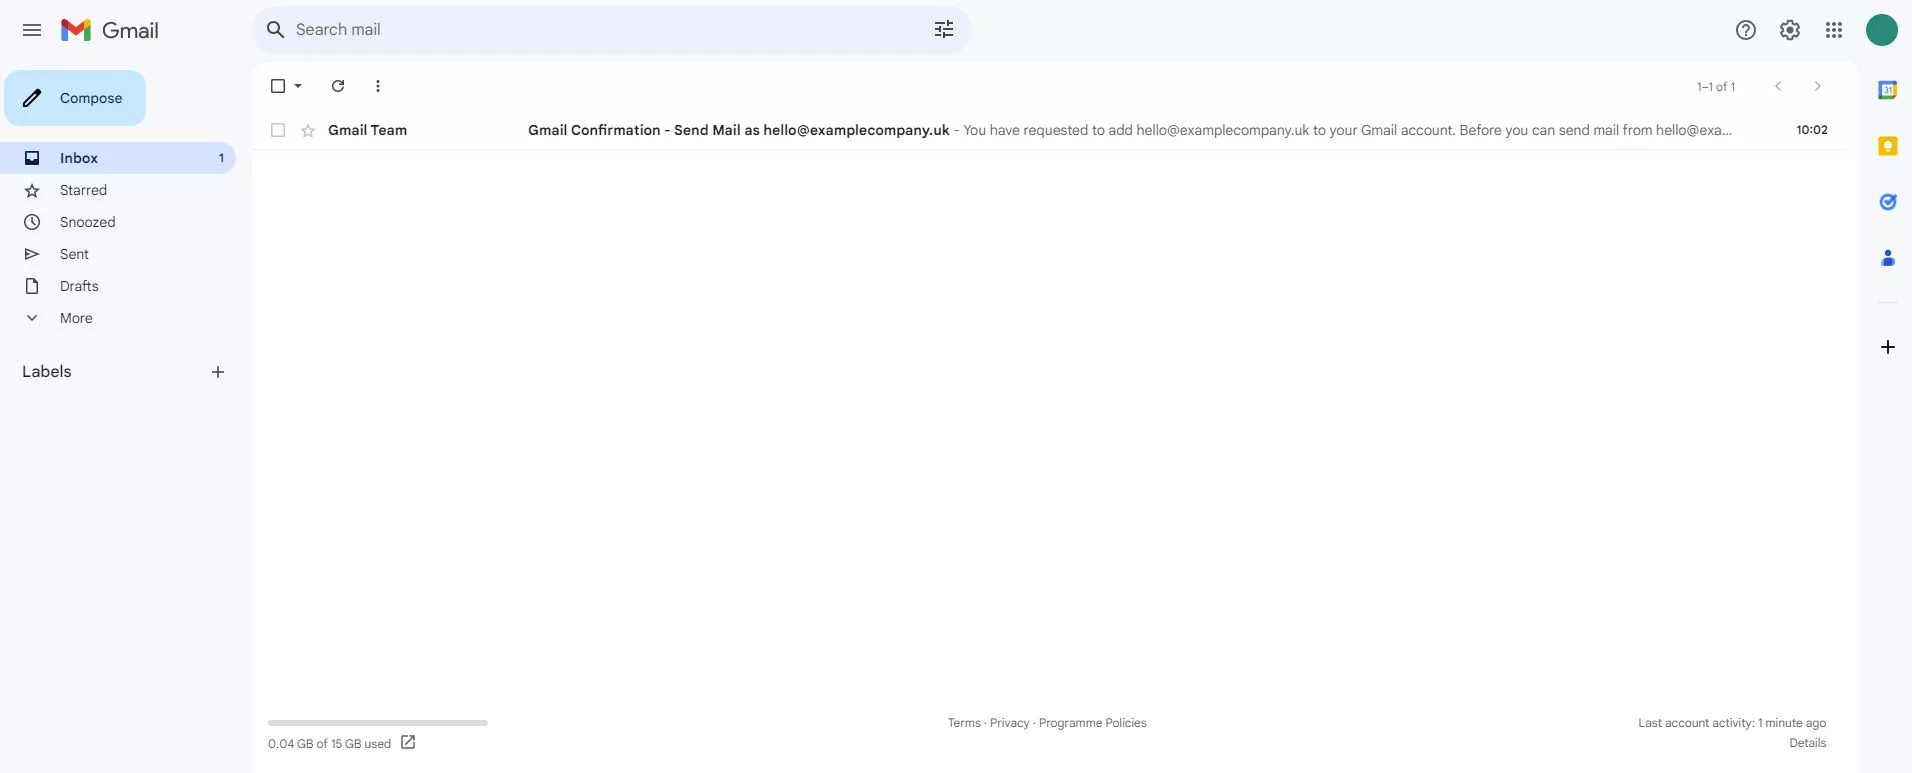
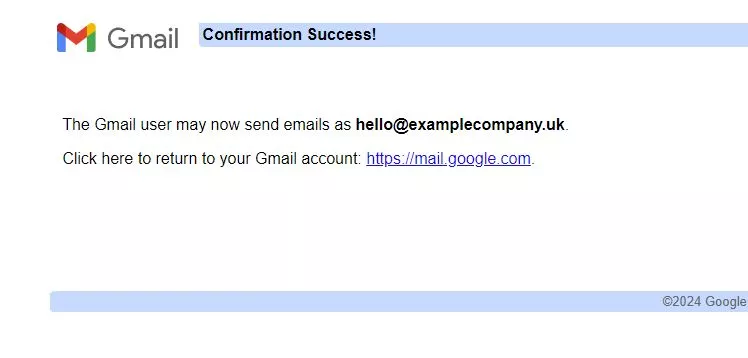
To complete the set up, please check your inbox for an email from Google containing the confirmation link/code. If you didn't receive the code, you can find a "Resend email" link in the confirmation window.
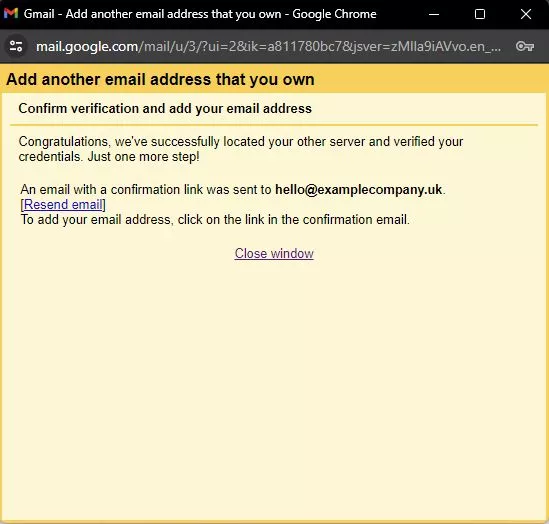
Follow the steps provided by google to confirm your email account.
Retrieving Emails
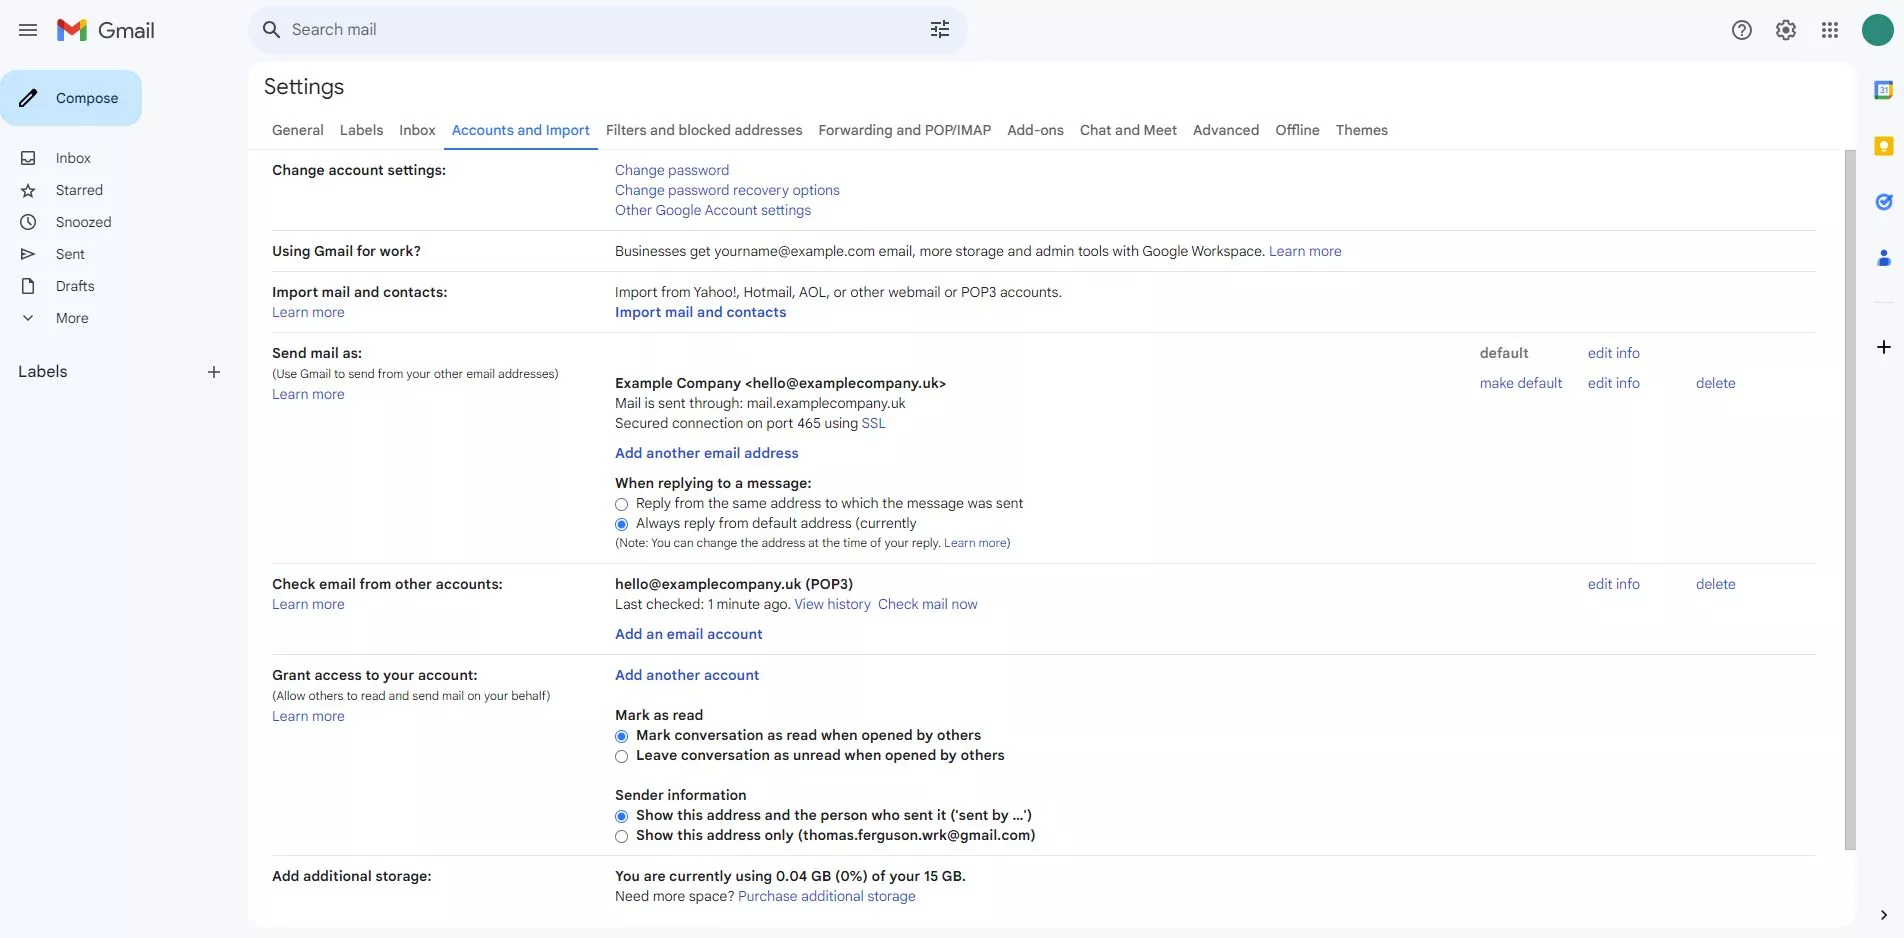
To refresh/retrieve your emails, enter your settings, "See all settings", followed by the "Accounts and Import" tab.
Once there, scroll to the "Check email from other accounts" section and click "check mail now", this will then retrieve any emails and display them in your inbox or in any relevant filters (if you have one created).
You're all set!
After confirming the account, you are now ready to start sending and receiving business emails from within your Gmail account.
When sending a new email, remember to check which email you are sending from as it will likely default to the original Gmail email address.
Creating A Filter
If you would like to create a filter to ensure you never miss any important emails, please see our tutorial on how to do so here.
Need Help?
If you run into any problems following this guide on setting up your business emails in Gmail, please feel free to contact our team here.
