
Although editing a blog post is large similar to a normal page, they carry some unique settings which we will explore in this tutorial.
Before We Start
This tutorial continues from our previous session on how to Add Blog Posts to your site, and assumes that you already have an existing blog feed and blog posts on your website. If you have any questions about the previous steps, please feel free to get in touch and we will be more than happy to help.
Logging In
As always, please start by logging into Easy Sites and navigating to the blog post you wish to edit. If you have misplaced your log in details, you can follow our Forgotten Password tutorial or raise a support ticket.
As a reminder, you can find your existing blog posts by selecting the Posts menu from the default Pages menu:
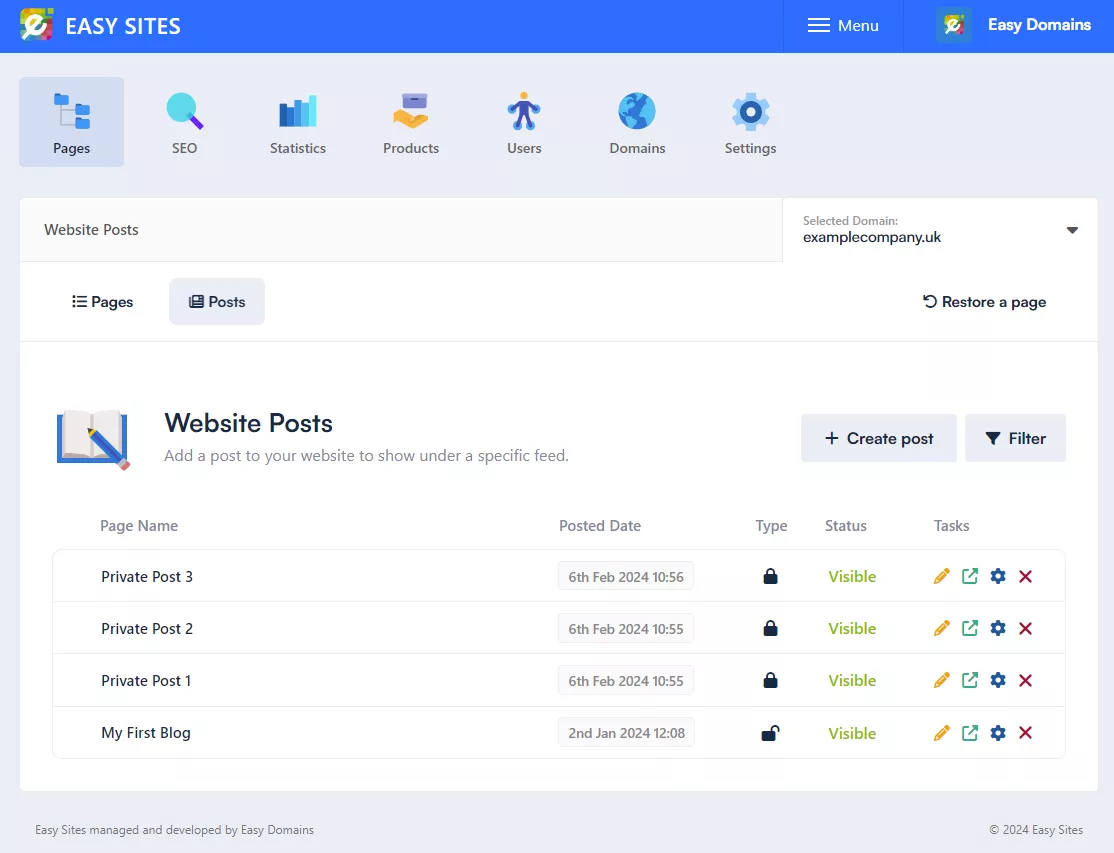
Editing Blogs
The Posts menu will display all existing blog posts on your site; to edit a blog post, please select the orange pencil icon to enter the editor.
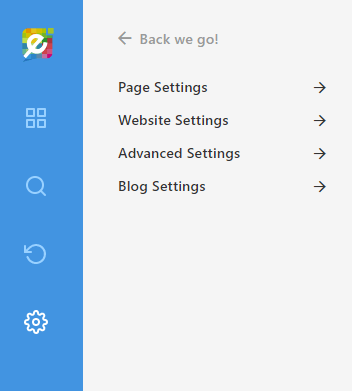
Blog Settings
Settings which are unique to blog posts can be found by selecting the Settings icon in the sidebar (the cog icon):
Blog Options
By selecting Blog Settings from the above menu, you will be presented with this list of options:
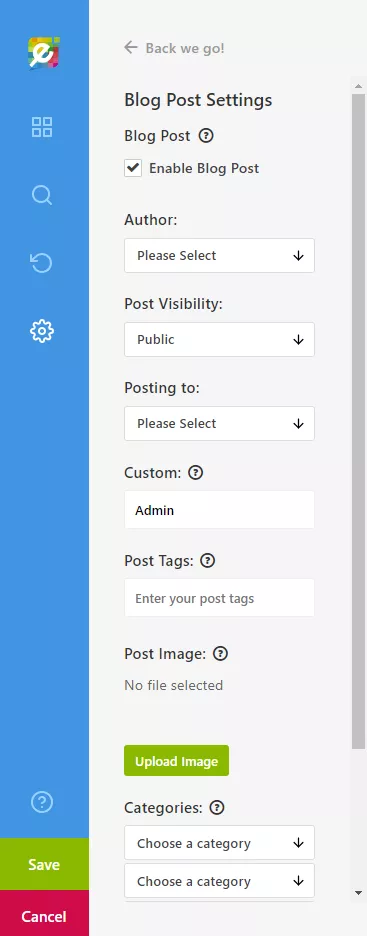
Here’s a little more about what each of them do:
Enable Blog Post: Ticked by default to apply Blog settings to this page, recognising this post as a blog post and displays it as such as within the News Feed page.
Author: Allows you to identify yourself as the author of this post.
Post Visibility: This option sets your post to visible/hidden on your news feed.
Posting To: This option selects which news feed to post to (if you have more than one).
Custom: This option overrides the Author field and displays the custom text inputted. As the default Author fields displays your full name, which you might not want to be publicised. This option is also useful if you have multiple people editing the site, or guest posts.
Post Tags: Post tags are useful words which helps to index and sort your posts. They should be short and relevant to the content. For example, a helpful post tag for this tutorial would be “Blog Posts”. You can have a maximum of 5 per blog post.
Post Image: This is the cover photo for your blog post. A thumbnail of this will appear in the News Feed page.
Categories: Much like Post Tags, categories are useful in indexing and organising your blog posts. Each blog post can belong a maximum of 3 category. To add a new Category, please press the green “Add category” button.
Scheduling: Perhaps one of the most convenient blog post features, you can specify a date/time for this blog post to be automatically published. This means you don’t have to set reminders to publish articles manually if you have them written in advance.
Saving Changes
After you’ve set up your blog post, don’t forget to click “Save” in the Editor sidebar to save your changes!
Need Help?
If you have any questions about blog post settings, you can get in touch here and we will be in touch as soon as possible to help with your query.