

This guide is for older software and is kept for reference. Microsoft retired the Windows Mail app at the end of 2024, and the new Outlook for Windows replaces it. For current steps, see How To Set Up Your Email In Outlook For Windows.
This guide will walk you through the process of setting up an email address in the default mail application included with Windows 10.
When you first open the Mail app you should be presented with the "Welcome Screen" which should help guide us through the process of setting up an email address.
Adding Account
Let’s start the setup by clicking "Add account".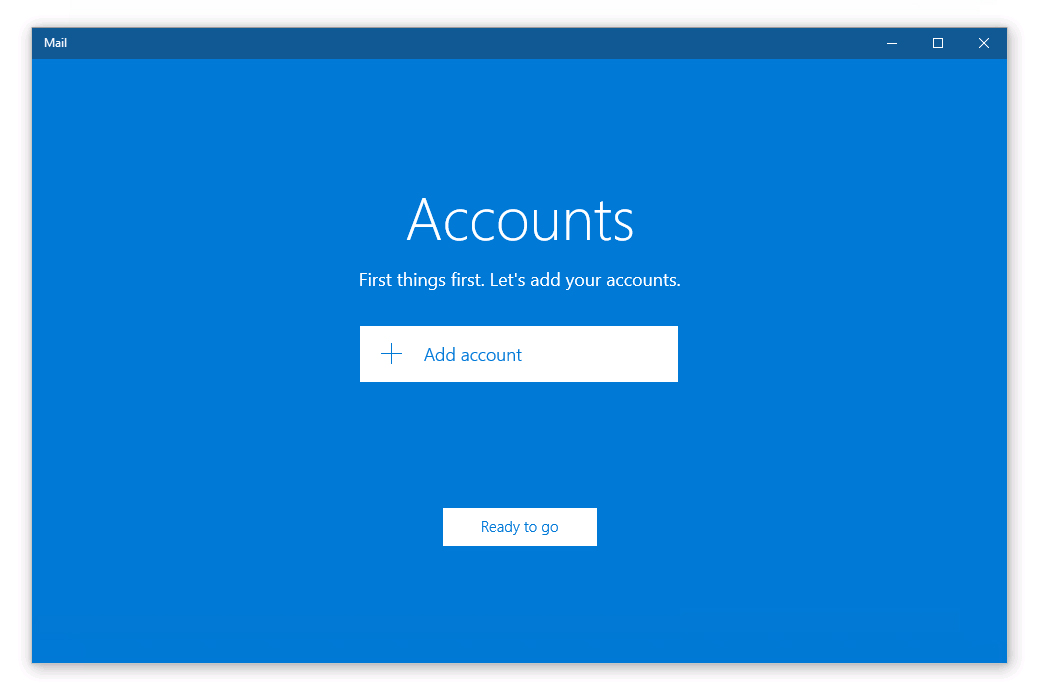
Selecting Account
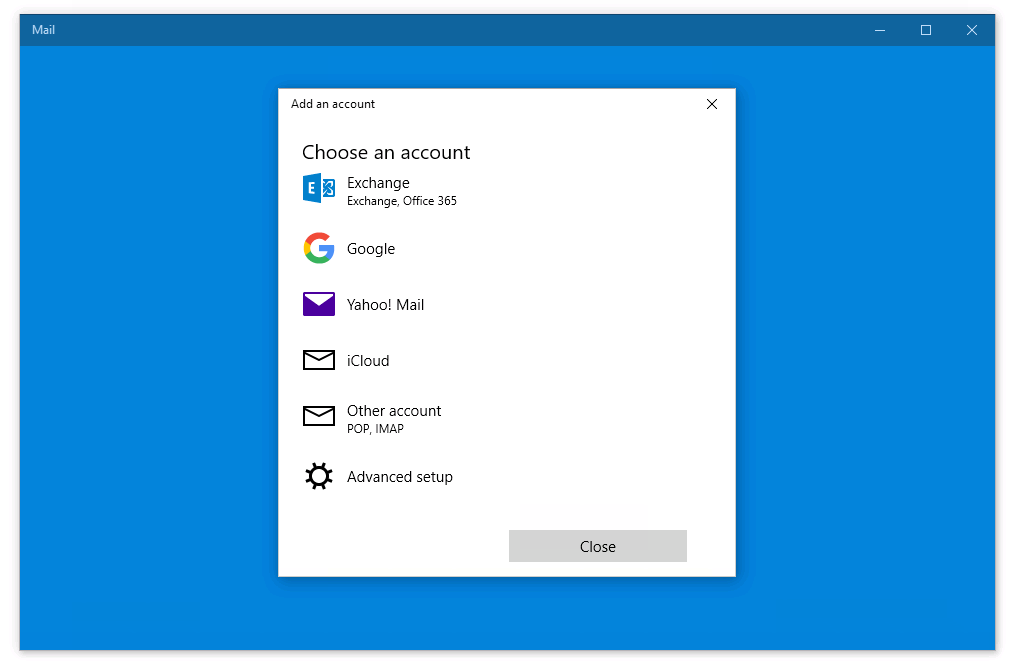
On this next screen (Add an account) you want to select "Advanced setup" to continue.
Advanced Set-Up
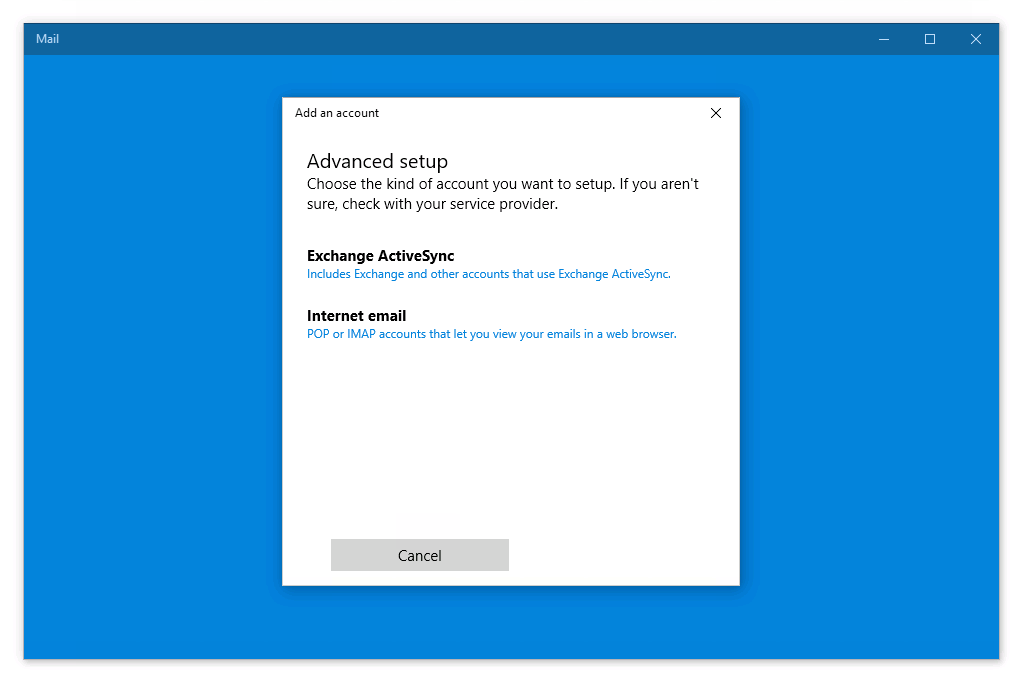
On the next screen, select "Internet email".
Mail Servers
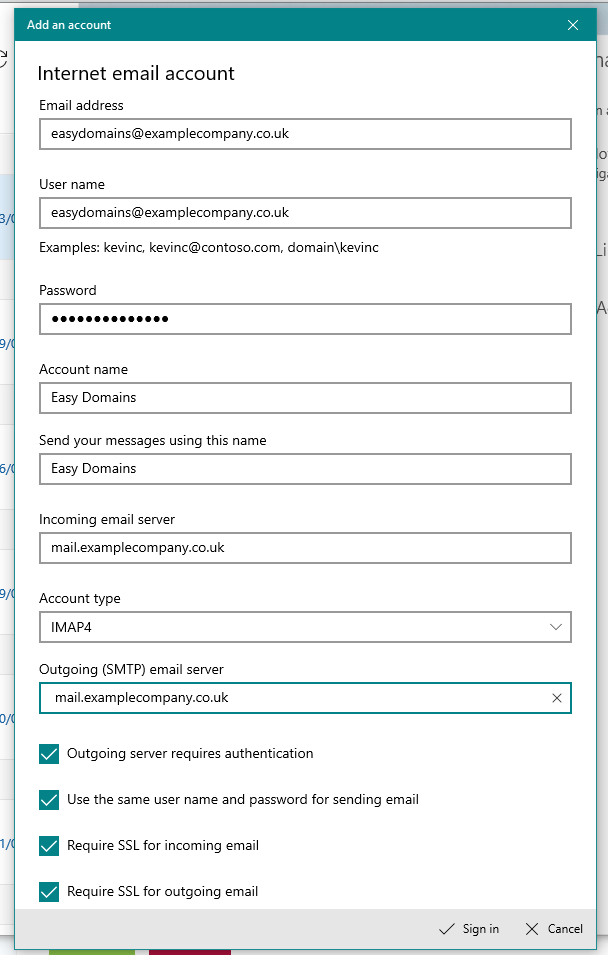
On this step, we need to enter all the email and server settings for your email account. If you are not sure what the mail settings are or where to find this information please check out our "How to Create an Email Address in Easy Sites". The information required is shown when you click the cog icon next to the email address you are setting up.
Once you have found the server settings, enter the information in the relevant fields. Please see the settings below for an example of where everything goes.
Example
Our servers require you use a secure connection to ensure your emails are encrypted. Please ensure the following options are ticked.
- Outgoing server requires authentication
- Use the same username and password for sending emails
- Require SSL for incoming emails
- Require SSL for outgoing emails
Once everything has been entered, please click "Sign in" to continue.
Completing Set-Up
Your email settings will now be checked and if everything tested successfully click "Done" to complete the setup process. Your emails are now set up; Mail will start synchronising all your emails. Click "New mail" to get started.
And you're done!
Need Help?
If you have any problems following this guide, please contact our team here.